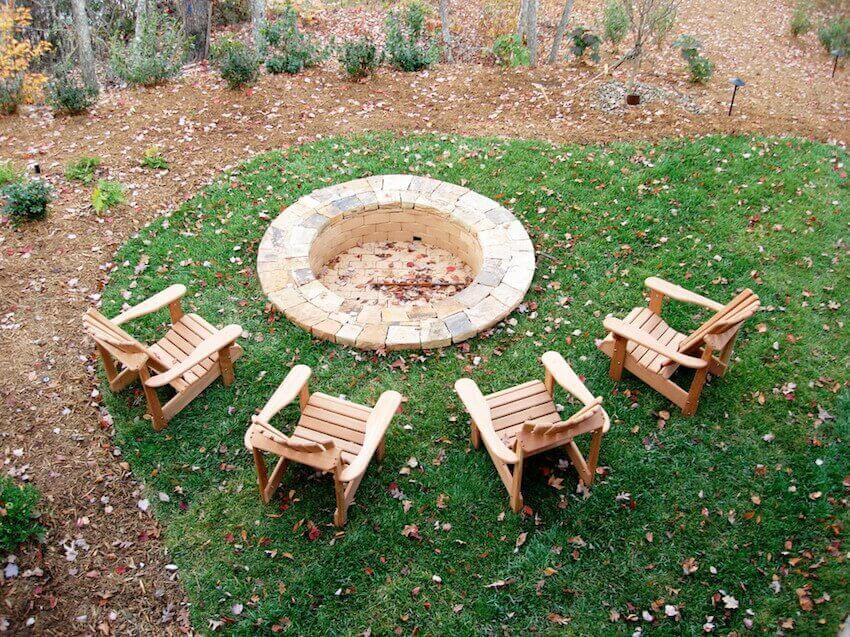
Humankind discovered how to control fire hundreds of thousands of years ago, and it continues to enchant us to this day. Especially during cool autumn evenings, nothing beats sitting beside a warm fire, roasting marshmallows and looking at the stars, and where better to do it than your own backyard? Instead of buying an expensive, out of place fire pit, you can easily build an in-ground area that looks classy and provides plenty of light and heat for a backyard gathering. The project is on average less than $500 and can be completed in one weekend, leaving you free to enjoy the warmth it provides with family and friends for the rest of the season and in years to come.

If you’re a novice DIYer or if the project seems too overwhelming, don’t be afraid to call a contractor who is skilled in masonry or who specializes in backyard fire pits. You won’t have to spend an entire weekend digging trenches and laying stones, plus there will be lower risk of the fire spreading unintentionally.
Gather Your Tools

Before you start, you’ll want to gather the tools you’ll need, or at least know where to access them:
- Cast-concrete stone look-alike blocks
- Capstones
- Masonry adhesive and caulking gun
- Steel campfire ring
- ¾ inch drainage gravel
- Spade (long-handled is best) and mallet
- Hand tamper
- Level (2 ft. and 4 ft.)
The concrete blocks should be flat on the top and bottom but have angled sides so they’ll form a ring when placed together. You need enough for four complete circles; the pit should be around 3 or 3.5 feet in diameter.
Decide on Location
Check your local codes regarding open flames, and make sure you have your landscaper take a look at your plans to minimize the risk of branches, trees, or other debris catching fire accidentally. Once you have the ‘go ahead’, lay out a ring of blocks where you want the fire pit so you know how many blocks you need and you can use a spade to mark the perimeter. Dig a trench 12 inches deep and as wide as a block; then dig the inner circle to be 6 inches deep. Check measurements of the trench with a ring of blocks; remove. Fill the trench with 6 inches of gravel (it should be level with the inner circle) and use the hand tamp for compacting/leveling.
Laying Brick

Place the first block and make sure it’s completely level; then line up the second block and make sure that the first one is level too - you can use the first block as a guide. Continue around the circle with the first ring and use the 4 foot level to check across the fire pit occasionally. Move on to the next ring: center the first block over a seam in the first ring, add some masonry adhesive and press it down. Masonry adhesive dries fast so only do one block at a time. Once you finish this ring, add 6 inches of gravel to the center so it’s up to ground level before adding rows 3 and 4, but then you can add those rows in a similar fashion. Afterwards, insert the steel campfire ring so that it’s level with the top of row 4.
Top It Off

For the last step, you want to arrange the capstone pieces so they extend one inch into the inner circle of the pit and two inches over the outer circle. Once you make sure you have the right number and they’ll fit together, add them one by one, using the masonry adhesive to glue them down. Finally, you can step back and admire your handiwork, but take a couple of days to stock up on firewood and s’mores supplies before you start building a fire (the pit needs those days for the blocks to settle and the glue to dry). Afterwards, have a seat and enjoy your very own DIY fire pit!